Editor’s Note: Join Dana Santas for a four-part series to learn how you can recover from and prevent low back pain. Santas, known as the “Mobility Maker,” is a certified strength and conditioning specialist and mind-body coach in professional sports, and is the author of “Practical Solutions for Back Pain Relief.” Here’s Part II.
When you’re suffering from back pain, perhaps the last thing you want to do is get out of bed. However, for most back pain sufferers, the path to relief actually involves moving through the pain. That notion may seem counterintuitive, but exercise is more effective for relieving lower back pain than passive approaches such as medication, bed rest and support braces, according to research.
In Part I of this series, we looked at why it’s important to understand the potential causes of back pain to assess the best treatment course.
Now, we’ll focus on helping you move through exercises to determine which ones can alleviate pain and restore your back health.
Movement as medicine
Designed for movement, your body needs to stay active for good health. When you’re sedentary for long periods, muscles weaken, connective tissue stiffens and joint lubrication reduces. Conversely, movement heals and sustains you. Your physiology rewards your activity by releasing feel-good hormones and decreasing stress.
The most common causes of back issues include poor breathing mechanics and posture, hip tension, physical trauma, age-related degeneration, sedentary lifestyle, excess weight or pregnancy, and stress. Because most of these tie to muscular issues, using corrective exercises to mobilize and strengthen the muscles that support and move the spine is key to reducing and preventing back pain.
Listening to your body
The mind-body connection is the bridge that helps you develop an attuned sense of your physical state, enabling you to respond to your body’s messages.
With back pain, misunderstanding or ignoring pain messages can cause injury, while overreacting can lead to unnecessary tests, medications and procedures that could slow down recovery. Leveraging your mind-body connection, you can better differentiate between cautionary sensations warning you to avoid particular movements and less severe ones stemming from muscle tension and joint stiffness. The latter is the kind of pain we want to move through to achieve relief.
Mindfulness meditation and breathing techniques can help strengthen your mind-body connection as you work through the exercises below.
Practicing corrective exercises
Here are three exercise categories for addressing low back pain with examples for you to try.
When practicing any exercises, stop immediately if your pain increases or feels “wrong.” Remember to pay attention to any sensations you experience.

I have designed these exercises to address the most common causes of back pain, but because not all back pain responds to the same remedy, not all exercises work for everyone. Talk with your doctor to understand the source of your pain and get approval before beginning any exercise program.
Although many of these exercises can work for low back pain with sciatic nerve symptoms, Part III in our series will focus on sciatica and offer additional methods for managing its nerve-related presentations.
1. Exercises for breathing and posture
Practicing proper diaphragmatic breathing is the foundation of all the back pain treatment and prevention programs I use in professional sports. Because your primary breathing muscle, the diaphragm, is also a core and postural muscle that attaches to your lumbar spine and rib cage, by establishing proper breathing biomechanics, you can realign your spine, pelvis and rib cage while strengthening your core. Deep breathing also decreases your body’s physiological stress response and facilitates recovery.
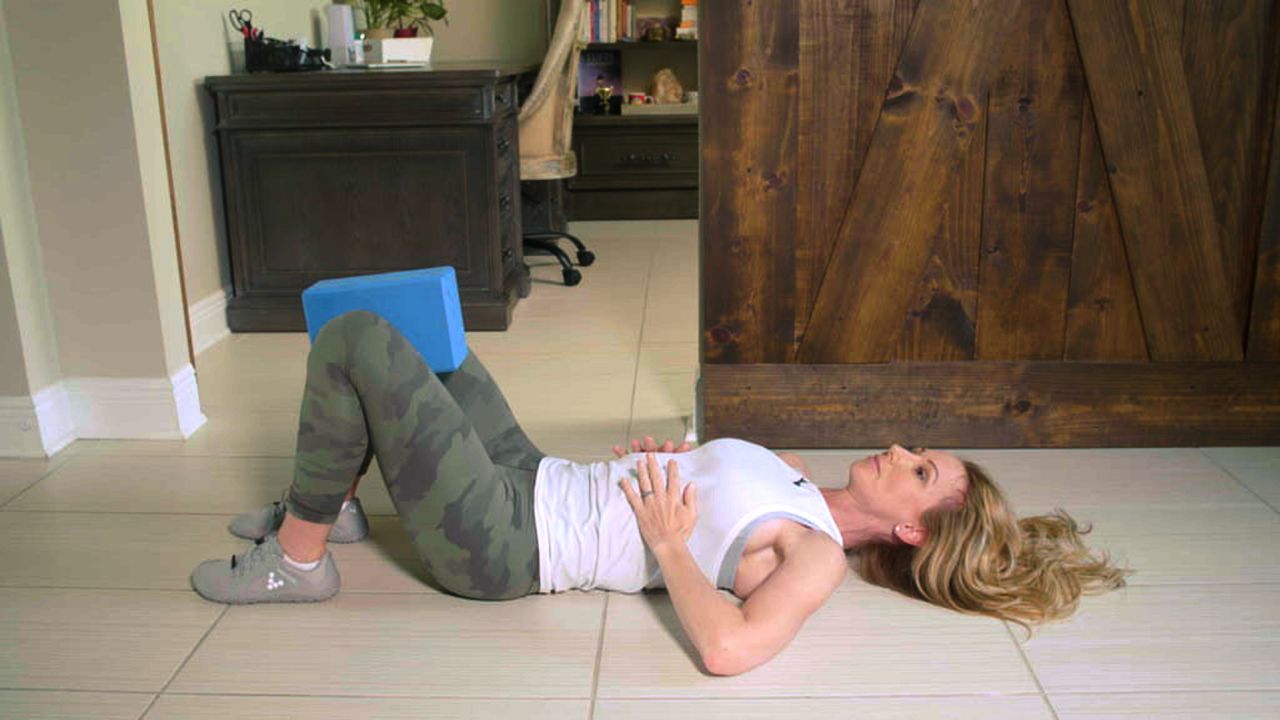
In addition to the 5-7-3 breathing exercise from Part I, try my breathing bridge exercise by following the directions below or watching this video (shown above). For information on breathing’s impact on overall health, read my breathing series.
Breathing bridge
Begin on your back with your knees bent and feet on the floor, hip-distance apart.
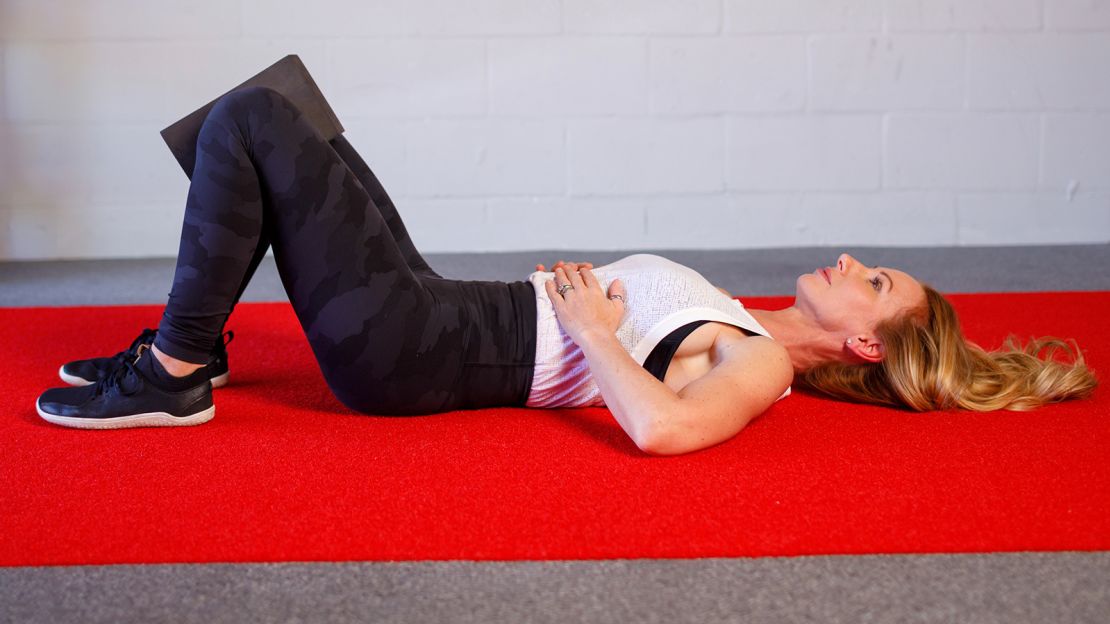
Hold a foam yoga block or rolled towel between your knees to keep them from splaying out.
Place your hands on your lower ribs to guide and monitor their movement in and out with each breath.
Exhale fully, drawing your lower ribs in toward each other, feeling your core turn on and your rib cage move down. At the end of that exhale, without inhaling, tuck your tailbone to flatten your low back and lift your hips 3 or 4 inches off the floor.
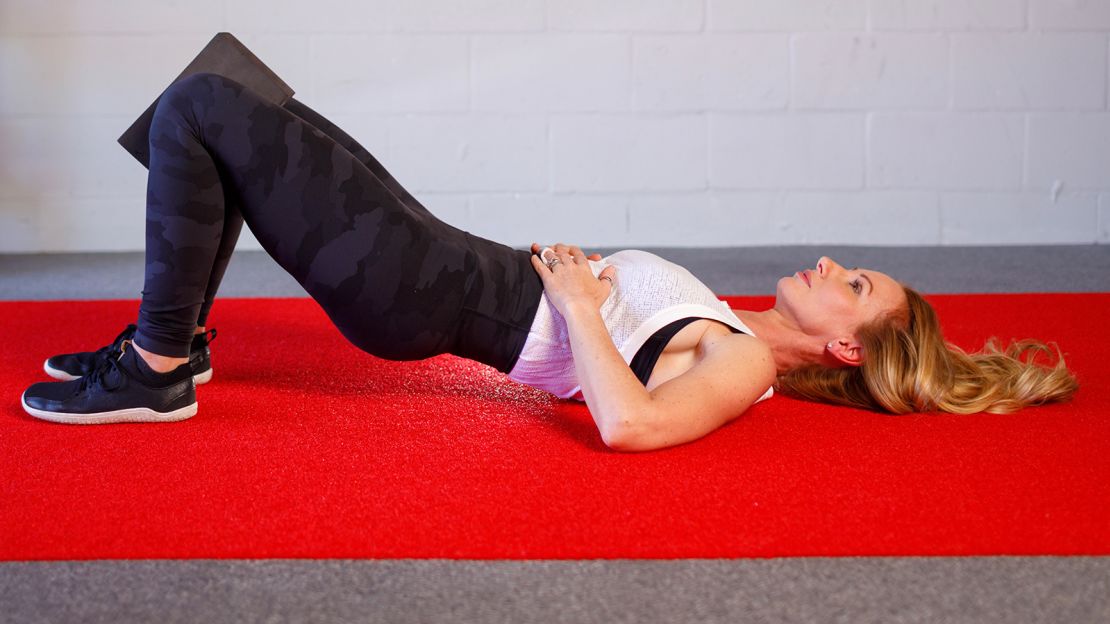
Maintaining the bridge posture, take five long, deep breaths, focused on proper rib movement, particularly on exhales.
Hold this position using the strength of your core and glutes to avoid letting your low back arch.
Avoid upward movement of your rib cage while breathing; you shouldn’t feel stress or tension in your jaw, neck or shoulders.
If you experience cautionary pain when lifting your hips into the bridge, keep your hips and back on the floor as you practice your breaths.
Practice two sets for a total of 10 breaths.
2. Exercises for hip and pelvis mobility
The lumbar vertebrae in your low back are not designed for twisting; they are meant to be stable. The hips are designed with ball-and-socket joints to enable rotation in all directions.
Unfortunately, if your hips are tight or your pelvis doesn’t move freely, you put pressure on your low back. It’s important to avoid that pressure by creating a healthy balance of hip and pelvis mobility and lumbar stability.
Addressing the hip flexors is a key starting point for hip and pelvis mobility. Check out this video for my three-direction hip flexor release.
3. Exercises for midback rotation
Your thoracic spine in the middle of your back is designed for rotation, and when it doesn’t rotate well, it causes your low back to compensate. Midback rotation exercises are good for relieving low back pressure and creating healthy spinal movement.
This double bent-knee twist uses breathing and corresponding rib movement to support healthy rotation from the middle of your back while keeping your low back stable. When trying any type of midback twisting exercise, keep these instructions in mind.
Double bent-knee twist
Lie on your right side with your knees bent at 90 degrees and aligned out in front of your hips.
Use a pad or pillow under your head to keep your neck neutral.
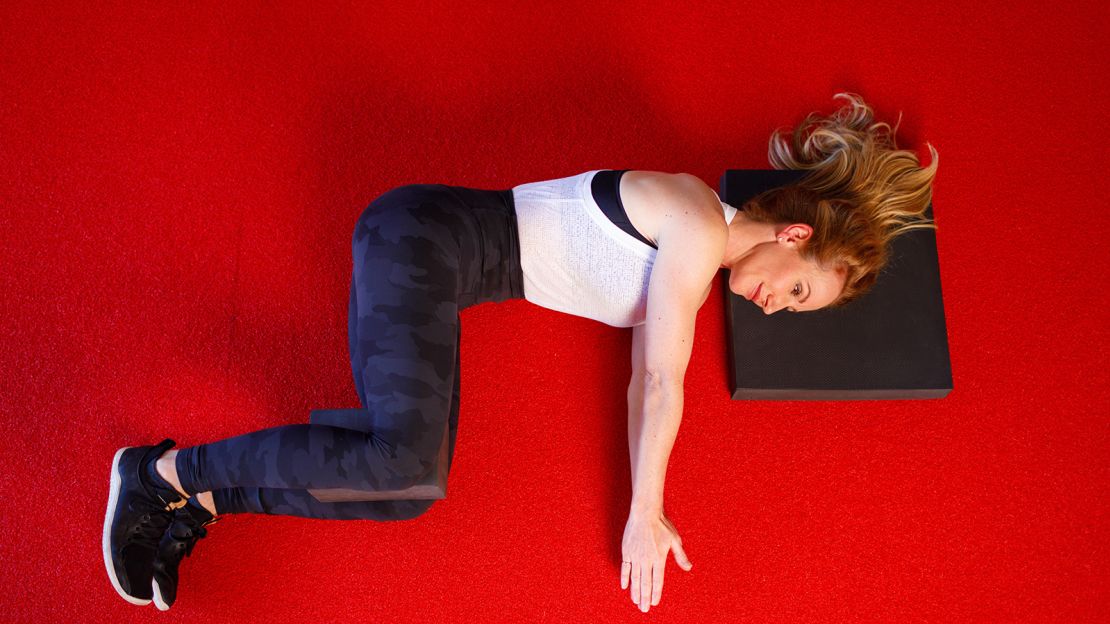
Place a yoga block or pillow between your knees.
Make sure to stack your shoulders, hips and knees.
Reach both arms straight out in front of you in line with your shoulders with your palms together, hands resting on the floor.
Inhale as you open your left arm to the left while keeping your lower body in place on the right; knees and hips remain aligned and stacked. This is important for keeping your low back stable.
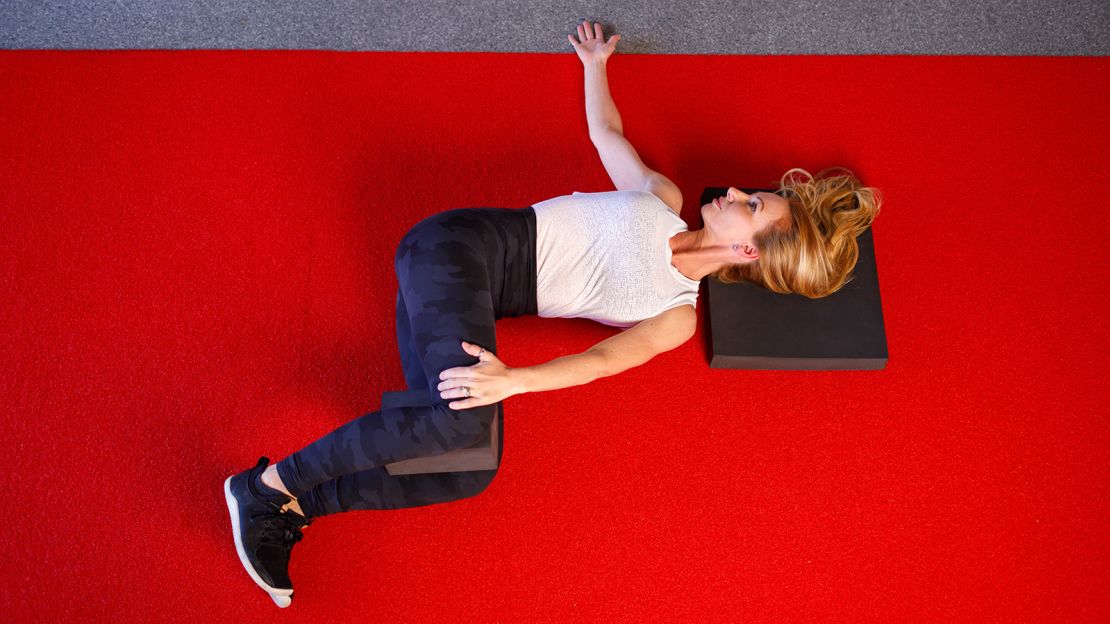
Twist from the middle of your back – not your low back.
Place your right hand on the outside of your left leg to help hold it in place.
Exhale and focus on drawing your lower ribs inward on the right side of your rib cage to help rotate your rib cage and thoracic spine further into the twist.
Take four more breaths, holding the position and continuing to focus on rib movement on exhales to guide the rotation. Then release back to the start.
Repeat from the left side.
After trying exercises that fit into these three categories, decide what works for you and do them daily for at least two weeks.
If sciatica is an aspect of your low back pain, look for the next article in this series for techniques to alleviate your nerve pain. Once you start to see improvement in your back health, refer to the series’ fourth installment to create a proactive maintenance plan to keep you out of pain.
Subscribe to CNN’s Fitness, But Better newsletter. Sign up for our newsletter series to ease into a healthy routine, backed by experts.

